It Just Has To Be Delicious

brownie

I didn’t know if dairy-free chocolate brownies would taste okay, but I made them today and they were rather good.
The dairy item in a ‘normal’ brownie is butter, I replaced the butter with a vegan spread called Nuttelex – which is just emulsified olive oil.

Recipe:
75g plain flour
half a teaspoon of baking powder
a quarter of a teaspoon of salt
160g fine dark chocolate (I used Lindt 70% which is dark enough to be classed as vegan and dairy free)
200g Nuttelex or other non-dairy spread
4 eggs (or equivalent egg replacer if vegan)
220g brown sugar (this is half the amount that the original recipe recommended!)
1 teaspoon of vanilla essence

  1. Line a 8 inch (20cm) square cake tin with baking parchment and heat the oven up to 170 deg C.
  2. Melt the chocolate and spread in a double boiler or a glass bowl over a saucepan of gently simmering water – don’t let the water touch the bottom of the bowl.
  3. Meanwhile whisk up the eggs, sugar and vanilla in another bowl until foamy and creamy.
  4. Mix the flour, salt and baking powder together in a separate bowl.
  5. When the chocolate and spread has melted, leave it to cool for a while (but don’t let it go hard) about 5 minutes.
  6. Stir the chocolate mixture into the whisked eggs and mix well. Use a spatula to scrape all ofthe chocolatey mix out – don’t waste a drop.
  7. Now fold in the flour/salt/baking powder gently until it is all combined.
  8. Pour the mixture into the baking tin and bake for approx 35-40 minutes. When done it should be crispy on top, but gooey in the middle although a skewer should come out clean.

Mmmmm – serve warm with a nice cup of tea.

Overnight Oats

oo

Overnight oats are so quick and easy to prepare and very adaptable to suit your own preferences. You can use any milk or combination of milks that you like, any fruits, you can add flavourings and sweeteners to suit your diet.
All of my overnight oats start with a basic recipe of half a cup of breakfast oats (this is one serve). Oats are relatively gluten free but they can contain traces because they tend to be manufactured in the same places as gluten cereals. If you are really allergic then buy gluten free oats. I then add approx 1 cup of milk. I tend to mix soy and almond milk, but you can use any milk – cow, goat, rice, coconut etc. You can also add yoghurt for a thicker consistency. I add a teaspoon of chia seeds – you can add more if you wish, but chia can be calorie rich so keep an eye on what you are adding.
I then add something to spice it up a bit like cinnamon or mixed spice. Give it a good stir because cinnamon doesn’t really dissolve in the milk. You can also add any supplements like whey protein, spirulina etc., seeds, or dried fruits like dates, apricots, sultanas, mixed peel.
My next addition to the pot is two types of chopped, sliced, or grated fruit. My favourites are grated apple (wonderful with cinnamon), pear, fresh raspberries, strawberries, blueberries, white peach and banana but you can use any fruits you like. The berries tend to be lower in calories than other fruits.
If you prefer sweetener, add a little sugar or some maple syrup, agave syrup or honey, but it really shouldn’t need any. Give everything a good stir, make sure the chia hasn’t clumped, and make sure that the oats are coated in the milk.
You can make a huge portion in a bowl and store it in the fridge, but I prefer to make individual portions in mason jars. Leave them in the fridge overnight and then they are ready to serve in the morning. I eat mine cold, but you can warm it up in a microwave or saucepan if you prefer. Couldn’t be easier.

oo 2

Lemon Cake

lc

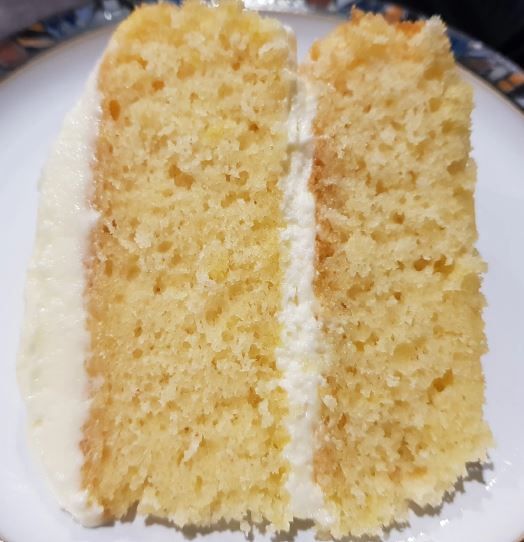
I do love a lemon cake, and this recipe makes a lovely light lemony sponge. The amounts for the frosting are approximate because I add and taste as I go along.
Set the oven to 170 deg C and grease and prepare two standard cake tins. I like to put baking parchment in the base and I tend to use springform tins because its easier to pop the cakes out once they’re done.

Ingredients:
Cake:

170g butter (or Nuttelex Buttery or other vegan butter/substitute if you are dairy free)
200g caster sugar
4 eggs beaten
320g plain flour
4 tablespoons of cornflour
Half a teaspoon of salt
One and a half teaspoons of baking powder
1 cup of milk (you can use soy, almond, coconut, or a mixture if you are dairy free)
A quarter of a cup (60 mls) of vegetable oil (don’t use olive oil – it will taste too olivey)
The zest of 2 lemons and 60mls of lemon juice (wash the lemons before zesting them)
Frosting:
Approx 150g of butter or non-dairy substitute
Approx 125g (1 cup) of icing sugar (powdered sugar)
Zest of 1 lemon plus some of the juice (see method)

Method:
1. Set the oven to 180 deg C (or 175 fan assisted).
2. Using an electric whisk, whisk the butter and sugar until light and creamy (2-3 minutes).
3. Add the eggs and whisk again for a minute or two.
4. Stir and fold in the dry ingredients – flour, cornflour, salt, lemon zest and baking powder.
5. Stir in the wet ingredients – milk, lemon juice, and oil.
6. The batter should be fairly liquid rather than thick . It’s okay if it is a little bit lumpy, but try to smooth out any big lumps.
7. Pour the batter into the prepared tins.
8. Bake for approx 20-30 minutes, but check them after 20 minutes. When they are lightly golden brown and a skewer or fork comes out of the mixture clean – they’re done.
9. Leave them for 5 minutes, then take the cakes out of the tins and cool on a cooling rack.

Frosting:
1. Using an electric whisk, whisk the butter or substitute until light and creamy.
2. Add the icing sugar slowly – it should thicken up.
3. Stir in the lemon zest.
4. Add some of the lemon juice and whisk again. Keep adding the lemon juice until the frosting is spreadable but not too runny. If you add too much lemon juice, add more icing sugar to thicken it up again. Taste the frosting to make sure it tastes good and isn’t too greasy or too acidic – adjust the sugar and lemon juice as required. If too lemony, you can always add water instead of juice to make it looser.
5. Place the base of the cake on a suitable plate or stand (you can line it with baking parchment if you like).
6. Spread half of the frosting in the middle of the cake and sandwich the halves together.
7. Spread or pipe the rest on top of the cake.
8. Put the kettle on… it’s tea and cake time !

Kung Po

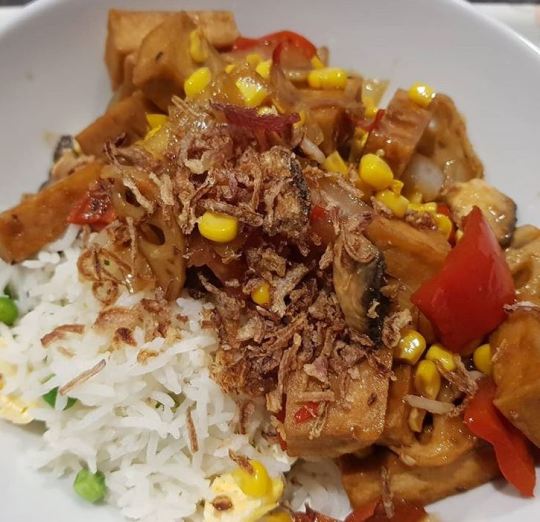
This is a nice recipe for mid-week dinner. You can pretty much make it up as you go along – it’s probably not the definitive authentic kung po recipe, but it works for me and is very tasty.

Kung Po Chicken:
kp 1

Kung Po Tofu:
kp 2

Serve it with rice. You can vary the veggies that you add to it depending on what you have in the cupboard, but traditional favourites are carrot, onion, baby sweetcorn, capsicum and tomatoes. You can also add peanuts and extra chilli if you like it hotter.
It contains dried chillies, which are quite hot, if you don’t want it to be quite so spicy, leave the dried chilli seeds out.
You can also use fresh chilli instead of dried – use whatever you prefer or have available – even a teaspoon of chilli paste would work.
This recipe is for chicken, but you can use tofu, prawns, or pork instead.

Recipe – serves 2 :
300g chicken sliced into thin bite sized strips (or other meat or firm pieces of tofu)
1 tablespoon cornflour
1/2 teaspoon crushed szechuan peppercorns
2 tablespoons hoisin sauce
1 tablespoon dark soy
1 tablespoon rice wine vinegar
1 or 2 chopped dried red chillies with or without seeds
Mixed veg, sliced thinly for stir frying e.g.:
Carrot, baby sweetcorn, red onion, capsicum, tomatoes, mushroom, broccoli, beansprouts, snow peas.
Peanuts (optional)

1. Mix the cornflour with the crushed peppercorns, and coat the chicken with the flour mixture.
2. Mix together the sauce ingredients in a jug – hoisin, dark soy, rice wine vinegar and dried chilli.
3. Prepare your veggies of choice by washing and slicing them thinly – allow a handful of veggies per person.
4. Heat a wok with 2-3 tablespoons of vegetable or groundnut oil in it.
5. When hot, add the chicken and stir fry for approx 4 minutes.
6. Now add the veggies and peanuts and stir fry for a further 3-4 minutes.
7. Add the sauce (rinse the jug with a little water to get every last drop). Heat the sauce through and stir it to coat all of the veggies and chicken. When the chicken is cooked, it is ready – cut through a piece of chicken to be sure.
8. If you like it salty, you can add some salt at this stage, but I find that the dark soy adds plenty of salt flavour.
Serve with rice and enjoy.

Dukkah

duk

Dukkah or Duqqa is a Middle-eastern dish which is a mixture of nuts, spices and herbs. It is quite versatile – I made mine to serve as a starter with bread. To use it this way, you serve some fresh crusty bread of your choice, a dish of olive oil with some balsamic vinegar added, then you tear off a piece of bread, dip it in the oil/balsamic and then dip it in the dukkah so that the dukkah mixture sticks to the bread. You can also dip fresh veggies in the same way. Dukkah can also be used as a crust for fish or chicken that you are going to oven bake or pan fry. This recipe makes quite a large quantity, so adjust the quantities to suit your needs. this quantity will easily serve 8 people if you are implementing the bread/oil starter idea, and you still might have some left over to use as a crust for a midweek meal.
There are a lot of variations, the following is the version that I made, but you can use different varieties of nuts, herbs and spices to get different flavour combinations. You don’t have to fry and toast the ingredients, but it really makes the end result more flavoursome if you make the effort.

This is what I did:
1. I heated the oven to 180 deg C. I put 120g of hazelnuts on a baking sheet and toasted them for about 5 minutes, shaking them regularly. Don’t burn them. When you take them out they should smell nice, as if the flavours are being released. I then whizzed up the nuts in a food processor so that they were a nice biscuit crumb consistency, and placed them in a large bowl.
2. I dry fried 80g of sesame seeds in a heavy based pan for 2 minutes, shaking them around as they heated. I then added them to the hazelnuts.
3. I dry fried 2 tablespoons each of coriander and cumin seeds in the same pan for 1-2 minutes until the aroma was released. I then ground them up in my spice grinder and added them to the bowl.
4. I added a further tablespoon of smoky paprika, a dash of chilli and a tablespoon of mixed dried herbs, along with approx 2 teaspoons of ground black pepper and a teaspoon of salt.
5. I mixed it thoroughly, and then tasted the mixture, adjusting the salt and pepper to taste.
Variation ideas are detailed below – you can have fun making the mixture that suits your tastes:
Nuts you can use include pine nuts, brazils, macadamias, almonds, pistachios, cashews. You can also add chilli, star anise, fennel seeds, cloves, cardamom, cayenne, thyme, mint, oregano etc.

jc

This curry is fairly quick and easy to make – if you want to be super organised, you can make up the sauce in advance and then just heat the sauce and drop the prawns in when you want to serve it. Make sure that you use raw prawns – they are readily available in supermarkets or your local fish market. Make sure that you remove the shells if you buy them shell-on, and the black gut (as it will be bitter). If you want to make your prawns go further you can slice them lengthways or chop them up. You can also use fish or crab in this curry. The curry is light and coconutty, and you can add as much chilli as you want
depending on your ability to cope with chilli. If you are allergic to garlic like my friend Kara, just replace the garlic with half a small red onion, and season a little more (i.e. add extra salt and garam masala at the end when you are tasting it).
This recipe serves 4 people.

Recipe
400g fresh or thawed raw prawns, gut removed (prawns are ‘jhinga’ – it’s fun to learn the Indian names)
Half a teaspoon of salt
2 tablespoons white wine or cider vinegar
1 teaspoon ground cumin (jeera)
2 teaspoons ground coriander (dhania)
1 teaspoon ground turmeric (haldi)
A quarter teaspoon chilli powder (mirch) you can double this amount if you like a hotter curry
Half a teaspoon freshly ground black peppercorns (gol mirch)
1 small onion finely chopped
2.5 cm fresh ginger peeled and grated
4 large cloves garlic peeled and crushed
2 fresh green chillies seeded and sliced (you can ad extra at the end if the curry is not hot enough)
1 tin of coconut milk (approx 400ml)
2 tablespoons fresh coriander leaves chopped

1. Put the prawns in a mixing bowl with the salt and white wine or cider vinegar – leave to marinate for approx 15 minutes.
2. Mix the dry spices together in a bowl and set aside – this is the cumin, coriander, turmeric, chilli and black pepper.
3. Heat 3 tablespoons oil (sunflower, peanut or similar non-flavoured oil) over a medium heat and fry the onions gently until they are golden – this will take about 8 minutes, don’t burn them.
4. Add the ginger and garlic and fry for a minute.
5. Add the little bowl of ground spices and fry for another minute.
6. Add the coconut milk and the fresh green chillies. After warming this through, taste and add more salt and chilli if required.
7. Add the prawns and cook until they are just opaque – don’t overdo them or they will be tough. Garnish with the fresh coriander.
8. Serve with rice and veggies (e.g. aloo gobi, bombay aloo, mushroom bhajee)

I used to be terrible at making yorkshire puddings. My efforts were always a bit hit and miss, sometimes really tall and lovely, sometimes flat and stodgy.
In my opinion the perfect yorkshire pudding has to be tall and crispy around the edges and soft in the middle, then you can pour your gravy in the middle and enjoy the contrast of soft and crispy textures.

My epiphany happened when I saw Jamie Oliver making yorkshire puddings. His method is so simple it is ridiculous.

Here are the basic pre-requisites:
1. Have your oven as hot as possible – the ideal time to cook your yorkshire puds is when you have taken the meat out to rest – you can then crank the oven up to between 200 and 220 deg C.
2. Put your tin or tins in early to get the fat as hot as possible – it doesn’t matter if you make individual yorkies in a muffin tin or one big communal yorkie – just get the tin in early.
3. Make sure there is enough fat to cover the bottom of the tin – I use lard because it imparts extra flavour, but you can also use oil.
4. Now for the recipe – use equal volumes of egg, milk and plain flour plus a pinch of salt. I always measure out the egg first – a one egg yorkie in a standard 7 inch round cake tin will serve 2-3 people, so just scale up from there. Use a measuring jug – if one egg measures 50mls, add 50mls of milk and then spoon flour on top up to the 150ml mark. Add a pinch of salt (bigger pinch for bigger volumes) and whisk with a fork or a balloon whisk until it is
smooth. Don’t stress if there are a few small lumps, it will all be ok in the end.
5. When the fat is as hot as it can be, quickly pour the mixture in the tin, put it back in the oven for 15-20 mins and watch it rise perfectly.

yp 1
yp 2

Naan bread

While chatting with my work colleagues who were drooling over the thought of a curry, I mentioned that I cook my naans on the barbecue. When you think about it, it’s an ideal substitute to a tandoor, you can get it very hot, close the lid and cook the naans for a few minutes each side – they puff up really well.
This is the standard naan recipe – if you want to make it more interesting you can mix fresh coriander, into the dough, or fold some cheese in, stuff it with potato, methi/fenugreek leaves or spicy mince (keema), or cook off some minced garlic and mix that through.

naan

Makes 6

Ingredients
yeast mix:
2 teaspoons dried yeast
2 teaspoons caster sugar
150ml lukewarm milk (use soy or rice milk for dairy free version)
Stir the above 3 ingredients together in a small a bowl and leave to froth and dissolve.

450g plain flour
1 teaspoon baking powder
half teaspoon salt (you can also use onion and garlic powder, but if you do this omit the salt)
150ml plain yoghurt (for dairy free version use coconut yoghurt OR approx 60mls coconut cream OR a tablespoon of lemon juice and 2 tablespoons dairy free spread, or omit the yoghurt completely)
1 egg (lightly beaten) OR egg replacer for vegan version OR omit
2 tablespoons oil (vegetable oil is ideal – don’t use a strongly flavoured oil)

Method
1. Sift the dry ingredients into a bowl – flour, baking powder, salt.
2. Add the wet ingredients – yeast mixture, egg, yoghurt, oil.
3. Mix together to form a ball of dough. Knead well.
4. Form into a ball, put a few drops of oil in a bowl and roll the dough in the oil, then wrap the bowl in cling film and leave in a warm place for an hour.
5. Knead the dough again and divide into 6 balls.
6. Roll the balls into naan shapes.
7. Cook on a very hot barbecue for a few minutes each side, or on the bars of a very hot oven. If you have a tandoor, of course, cook them in the tandoor. They should puff up nicely.

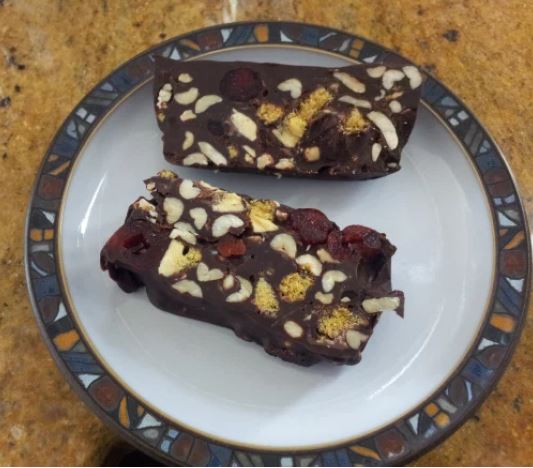
Making your own chocolate bars is so easy, and you can guarantee that your guests will love them.

gcb

The recipe here is for adult chocolate bars with dark chocolate and salty peanuts – but if you really can’t bear to go without milk chocolate, you can make them with milk, just use less butter otherwise they will be really soft. You can vary the fillings to suit your taste, I like glace cherries in mine, but you can also use crystallised ginger, caramelised nuts, slices of Cherry Ripe, M&Ms etc.

Recipe:
250g dark chocolate (try to use at least 70% cocoa) in small pieces
5 tablespoons butter (or dairy free spread)
2 tablespoons honey
1 1/2 to 2 cups of salted peanuts (the salt is essential – it brings out the flavour of the chocolate)
1 small pack of glace cherries
270g Crunchie bars, Dark Violet Crumble, or honeycomb chopped into small pieces

1. In a double boiler (or a bowl over a saucepan of water), melt the chocolate, butter and honey together. Do this gently and if you are using a bowl over water, don’t let the bowl touch the water.
2. While this is happening line a standard loaf tin with baking parchment. If you don’t have a loaf tin, you can use any container – a tupperware tub will do.
3. Put the glace cherries in a sieve and pour boiling water over them to remove the sticky coating. After a few minutes, run cold water over them to cool them down and dry them off well.
4. In another bowl combine the peanuts and the honeycomb, then add the glace cherries.
5. Once the chocolate/butter/honey has melted, take it off the heat and add the
nut/honeycomb/cherry mix. Stir well with a spatula.
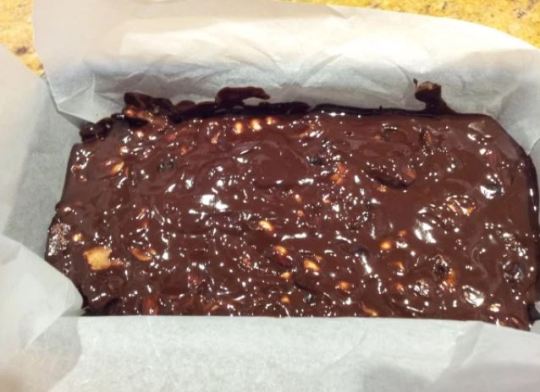
6. Transfer to your lined container and pack it down well with the spatula, then chill in the fridge for at least 4 hours.
7. When ready to serve, remove from the fridge and slice using a very sharp knife.

gcb 2

The bars make a really nice after dinner treat to serve your guests with coffee.

I went to this restaurant on a whim on a Saturday night. Fancying something a bit different from the usual Japanese, Chinese or fish and chips, I scoured Urbanspoon for something local and came across this restaurant.
It is BYO and right next door to a bottleshop which is very convenient. The staff are gentle and welcoming, and the restaurant is modern with a clean, elegant ambience. The menu is unsurprisingly very similar to an Indian menu with the usual favourites like samosas, pakoras, tandoori etc.
We were given cumin poppadoms while we read the menu – it would have been nice to have some pickles to go with them. We tried to choose something that we wouldn’t find in an Indian restaurant and opted for the Gurkhas special chicken curry, served on the bone:

gh 4

The Prawns Makhani which is in a creamy tomato sauce:

gh 3

To accompany this we chose pilau rice, mushroom bhaji and keema naan:

gh 5
gh 1
gh 2

All of the dishes were really good, certainly better than most Indian restaurants in the northern suburbs. My only improvement would be to add more seasoning to the mushroom bhaji.
I would be very happy to go back to this restaurant.

Last Visit Date – November 2014

Click here to find out more