It Just Has To Be Delicious

Posts tagged ‘Vegan’

Ten Acre Block, Pan Pacific, CBD

Ten Acre Block is located in the Pan Pacific where Uma Bar used to be. The tables are nicely spaced out and romantic, and the menu is a vegan degustation. The bar menu includes vegan and vegetable based cocktails as well as non alcoholic spirits. Wait staff are enthusiastic and pleasant to deal with, our waitress explained the menu and advised that we could slow it down or speed it up as we wished.

I started proceedings with a lovely Lemon Drop cocktail and waited for the procession of dishes to arrive.

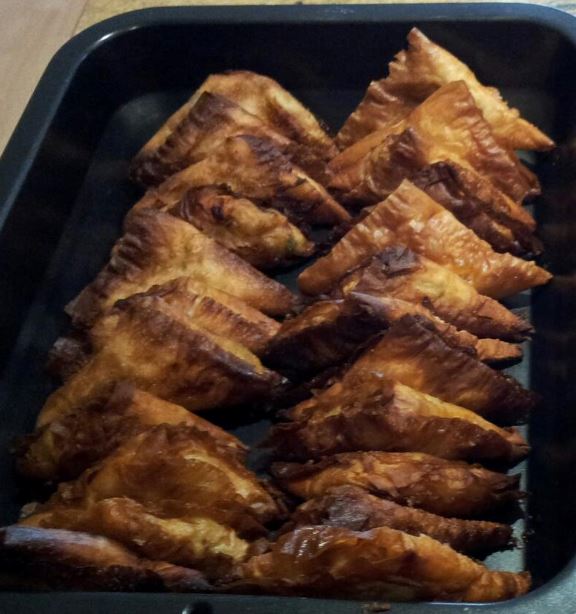
The first dish to arrive was sweet potato tartines with macadamia labneh and heirloom radish. These were lovely, with nicely matched flavours, and very good start to the meal.

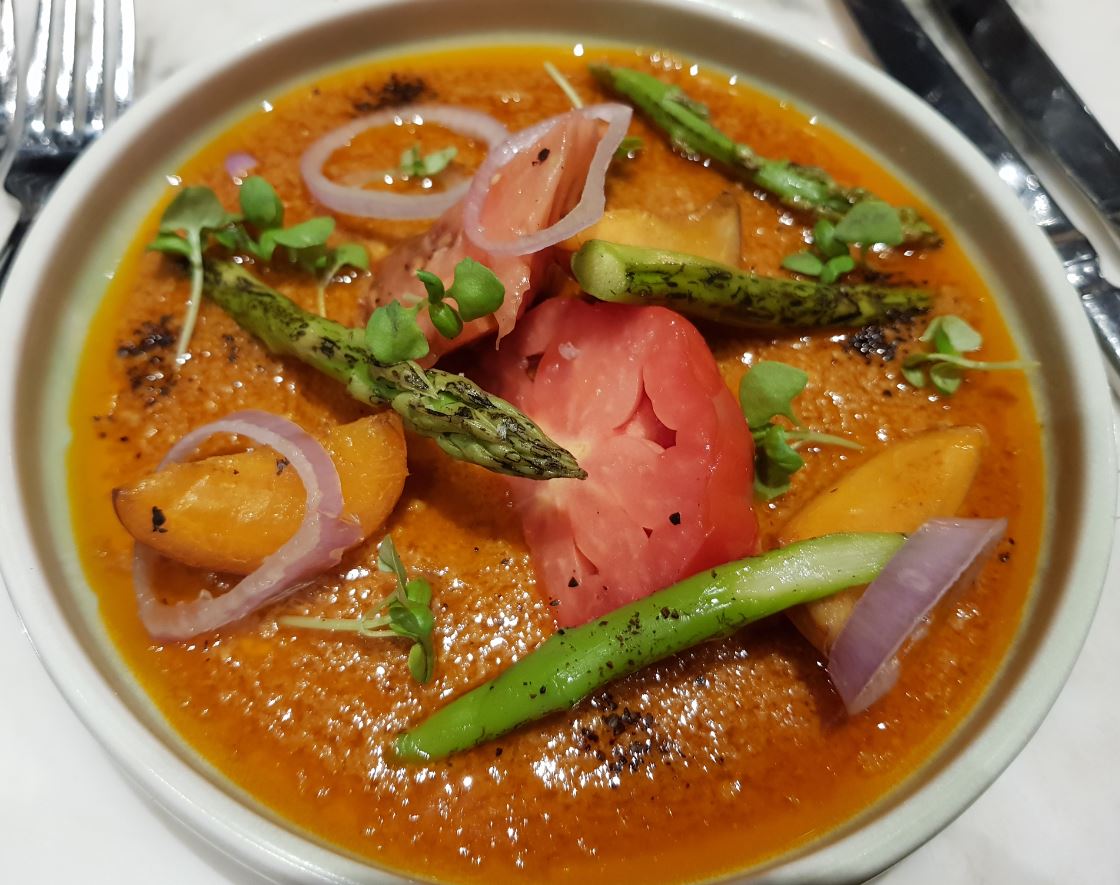
The second dish was the star of the show – chargrilled apricots, heirloom tomatoes and asparagus in Romesco sauce – absolutely delicious. The only problem was that there was a lot of sauce left and we could really have done with a hunk of bread to soak it all up. I mentioned this to the waitress who said “Yes, we’re looking into it” and whisked the plates away. Why not just bring a bread basket??

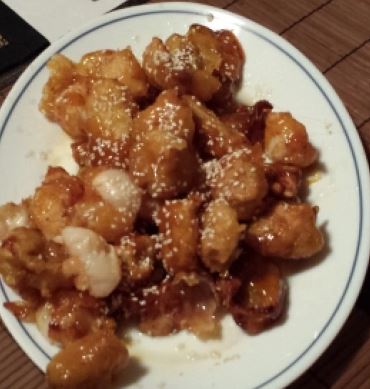
After the success of dish two the next course was a little disappointing – roast parsnips with kumquats and tera-miso and ginger. The central filling was a little stodgy, but the crispy outside was nice.

Next came a palate cleanser – camomile kombucha. It was a bit of an odd taste and not something that I would order.

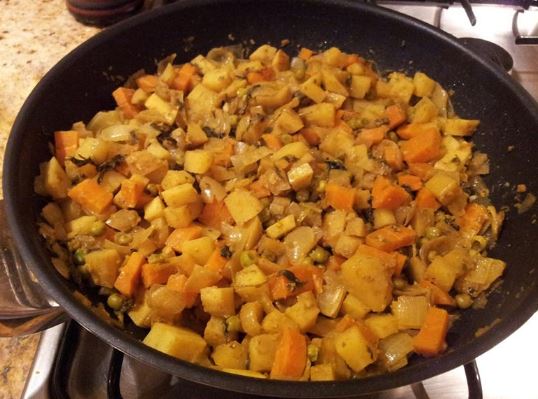
The ‘main’ of the degustation came next – eggplant, demi-glace, leek confit and legume sprouts. The eggplant was just underdone, and the leek sauce a little bland. The whole dish really needed some seasoning.

I was really looking forward to the pear and chocolate tart dessert – it’s one of my favourite combinations, but again this was a disappointment – the tart was dense and hard to eat, the pears were undercooked, and the core was an unpleasant thing to manoeuvre, I wish they had removed it before serving.

Petit fours were nice, the grapefruit tart was light and lovely and would have made a much better main dessert. The chocolate cup was just peanut butter in a cup and I would have preferred a lighter whipped filling – maybe with peanut butter and cashew cream.

We gave feedback on leaving and found out that they were still ‘trying dishes out’ and tweaking the menu. Surely the menu should be piloted before giving it to the general public. This is an expensive way to be somebody’s food experiment!

Will I return? Probably not until they refine the menu – it’s nice to have a vegan degustation, but it also has to deliver with every dish, not just a few of them.

Last visit date – January 2021

Click here to find out more

Toffee Fruits

One of my fond memories of UK Chinese restaurants is the toffee fruit dessert served with ice cream. You can get it in Australia, but it’s not quite as common or popular as in the UK.
Most restaurants serve toffee apple or toffee banana, but I have seen lychee before and theoretically you can do it with any firm fruit that can withstand deep frying. Pineapple and pear would probably also be good options.
The recipe is not the easiest thing to do at first, but once you work it out, the results are so worth it. My first attempt does look a bit clumsy and messy, but the guests loved them. Now I know what to do, next time the presentation will be better.

You can prepare and deep fry the fruits in advance to save time. The batter is enough to coat two apples, a banana and a can of lychees, it is fairly thick and made up of:

100g plain flour
1 large egg – beaten
1 tablespoon of peanut (groundnut) or corn oil
120 ml water
I used a large high sided frypan to fry my fruits but you can also use a wok, saucepan or deep fat fryer.

To prepare the fruits:
Apples – peel and core the apple then cut into 8 wedges
Lychees – peel and stone fresh lychees, for canned lychees, drain them well (make sure there is no liquid in the centre) and pat them dry with kitchen paper.
Bananas – cut them into chunks – I used zig zag cuts along the length of the banana.
Coat the fruits in batter and deep fry them in an unflavoured oil e.g. corn oil or peanut (groundnut) oil. Make sure that the fruit is fully coated with batter – a thicker batter helps with this. Fry the apple and banana for about 4-5 minutes turning frequently until the batter is a light golden brown. The lychees take a bit less time. Drain them on kitchen paper to keep them as crispy as possible.
If you are not serving them straight away – once all of the pieces have been fried, allow the oil to cool, sieve it to get rid of any debris, and keep the oil for the second frying.
When you are almost ready to serve re-fry the fruit pieces in the hot oil for just a minute to warm them up and get them crispy again.
Now the tricky bit, have a bowl of iced water ready and some sesame seeds handy.
In a wok or saucepan, warm 3 tablespoons of groundnut or corn oil. Add 9 tablespoons of white caster sugar and dissolve it in the oil over the heat. It may take on a strange appearance and look like white lumps, but persevere – keep stirring all the time and don’t overheat it. When it is ready it will turn a pale golden brown. Quickly coat the fruit pieces in the caramel, remember as you put the fruit into the caramel it will start to cool, so work quickly, then drop each piece into the iced water which will immediately set the caramel and then place the pieces on a serving plate.

Tips – if you are using a spoon to transfer your fruit from the caramel to the ice water, don’t let the spoon touch the ice water or your toffee fruit will stick to the spoon. Warm your spoon(s) first so that you are not dipping cold spoons into warm caramel. The Chinese use chopsticks to do this – so if you are a dab hand with chopsticks…maybe try them.
I am not quite sure if it is best to add the sesame seeds to the caramel while the fruits are being coated, or afterwards when they are on the plate. I think that they stick better if you add them to the caramel.
I placed my platter on the table and everybody just used their fingers to serve the fruits straight to the mouth – it was a lovely communal food moment. They are delicious with vanilla ice cream. As you can see from my picture, some of my lychees popped out of their batter coating. I think this was because they were not 100% covered in batter, so next time I will make sure that they are fully coated.

toffee fruits

Kakiage

I love tempura – the light batter and the soft veggies are such a great contrast. You can make your own dipping sauce for these kakiage, but I prefer to serve them with a nice thick homemade mayonnaise. Mine are a bit smaller than the traditional round ones that you see at sushi bars, but they cook fairly quickly and are great to be prepared in advance and then reheated in a hot oven for 10 minutes.

kakiage

Ingredients:
You can use any veggies, but I chose a combination of sweetcorn, broccoli, carrot and onion. This recipe makes 6 kakiage (plus a tester).

1 Onion thinly sliced
2 Small carrots cut into matchstick size pieces
1 Portion of kernels cut from the cob of one ear of corn (remove husk and silk first)
5 florets of broccoli cut into small pieces
8 tablespoons of plain flour
2 tablespoons of corn flour
1 teaspoon of salt
200mls of cold water (preferably from the fridge)
Enough vegetable oil to fill a small saucepan about a third full.

Method:
1. While the saucepan of oil is heating, prepare the vegetables and place them in a bowl.
2. In a separate bowl or jug, mix the batter ingredients – salt, flour, cornflour and water. Don’t overmix the batter – a few small lumps will be okay.
3. Add the batter to the vegetables and mix well.
4. Check that the oil is ready by dropping a very small droplet of batter into the pan. If it fizzes and rises up, the temperature is probably right.
5. Using a very large metal spoon or heat resistant spatula, scoop up a large spoonful of the batter/veg mixture. Carefully slide it off the spoon and into the oil. It might look like it won’t hold together, but it will – don’t worry.
6. After 3-4 minutes, flip the kakiage and cook for another 3-4 minutes on the other side. The kakiage won’t go really dark, but some of the veggies may look a little brown, The onion strands should be lovely and crispy.
7. Drain on kitchen paper and serve immediately.
8. Alternatively place in a an oven dish and cover with foil. When you are ready to serve, warm them up in the oven for 10 minutes at 190 deg C.
9. Serve with mayonnaise, or tentsuyu sauce with grated daikon.

Other good veggies for this recipe are potato, sweet potato, green beans, eggplant, squash, mushrooms, cauliflower, broccolini, spring onion. I would always recommend using onion because it adds so much flavour and gives some nice raggedy crispy edges.

Samosas

I love samosas. This is a vegetarian recipe, but you can add minced lamb to the mixture if you prefer the meat version. I made mine with filo pastry – you can make the traditional samosa pastry if you like, but it is quite an art to get it right, and filo crisps up really well when you fry them. I asked my Indian friend Kesh if it is ok to use filo and he said yes, so if it’s good enough for him then I don’t feel too bad about cheating. Like the onion bhajias, you can fry these in advance and heat them up later in a hot oven.

sam 3

To make the filling you need:
2 onions chopped
4 medium potatoes diced small
2 carrots diced small
2 cups of frozen peas
1 teaspoon of salt
2 teaspoons of green masala paste (if you haven’t got any – whizz up a green chilli with 2 large cloves of garlic and and inch of root ginger)
1 teaspoon of grated fresh ginger
1 and a half teaspoons fresh crushed garlic
2 teaspoons sugar
half a teaspoon turmeric (haldi)
half a tablespoon ground coriander (dhania)
half a tablespoon ground cumin (jeera)
2 tablespoons lemon juice
a large handful of coriander leaves finely chopped

Method
1. Heat 3 tablespoons of sunflower or groundnut oil in a large pan or wok with a lid
2. Add the onions and fry gently for a few minutes, then add the rest of the ingredients and mix well.

sam 4

3. Cover and simmer over a low heat for up to 45 minutes (the cooking time will depend on how large the pieces are).
4. Test regularly with a knife to see if cooked (try a potato).
5. Stir through some butter or non dairy spread while still warm, and then set aside to cool. Next step you need butter or non dairy spread and some cornflour.
6. Melt some butter or non dairy spread to brush on the pastry.
7. Mix 1 teaspoon of cornflour with water to make a runny paste – this can be used to ‘glue’ the filo edges together if the samosas are a bit loose.

Once the filling has cooled, spread out some filo pastry on a work surface.
Take one sheet and brush it with the butter or dairy free spread and place another sheet over the top.
Slice the sheet vertically into approx 5 strips.
At the bottom of a strip place a spoonful of filling. Fold the corner over in a triangle, then back again in a zig zag pattern until the whole strip of pastry has been used. Seal the end with a dab of the cornflour paste.
Click here for a folding diagram.
Carry on until all of the filo and mixture is used up.
Deep fry in hot oil until brown and crispy. Drain on kitchen paper.
If not eating immediately they can be finished in a hot oven for 10 minutes.

Onion Bhajias

These little onion bhajias are magic – I think it’s nice to make them small because they end up crispier and not at all stodgy. If you are not eating them straight away, you can deep fry them in advance, and then finish them off in a hot oven which will crisp them up nicely.

ob 1

What you need depends on how many you are going to make – I managed to get around 25- 30 small ones out of this mixture.
Ingredients
1/2 cup of chick pea flour (chana flour or gram flour)
1 cup of self raising flour
2 onions halved and then sliced finely so that you get long bits which will crisp up
1/4 teaspoon turmeric (haldi)
1 teaspoon salt
1 teaspoon ground cumin (jeera)
1 teaspoon ground coriander (dhania)
1/4 teaspoon crushed star anise (soomph)
1/4 teaspoon chilli powder
1 teaspoon of green masala paste (if you don’t have this whizz up half a green chilli, a large clove of garlic and 1/2″ root ginger)
200ml water

Method
1. Mix all of the dry ingredients together in a bowl, then add the water to make a batter and mix till smooth (you can use a blender if you like), then add the onions and mix well.
2. Heat some oil in a large pan or deep fat fryer – it will be hot enough when a tiny drop of batter fizzes and rises to the surface.
3. Using two spoons press the batter into small balls – it will look like it wants to fall apart, but when you add it to the oil it will bind together and be ok.
4. Use tongs to fry until golden brown on both sides, flipping every minute.

ob 4

5. Drain on kitchen paper.
6. Either eat immediately or warm up later in a hot oven for about 10 minutes.
You can make a mint sauce to dip these in by whizzing up the following ingredients:
Yoghurt (you can also use coconut yoghurt), salt, fresh mint, fresh coriander, pinch of garam masala.

ob 3
ob 2

Overnight Oats

oo

Overnight oats are so quick and easy to prepare and very adaptable to suit your own preferences. You can use any milk or combination of milks that you like, any fruits, you can add flavourings and sweeteners to suit your diet.
All of my overnight oats start with a basic recipe of half a cup of breakfast oats (this is one serve). Oats are relatively gluten free but they can contain traces because they tend to be manufactured in the same places as gluten cereals. If you are really allergic then buy gluten free oats. I then add approx 1 cup of milk. I tend to mix soy and almond milk, but you can use any milk – cow, goat, rice, coconut etc. You can also add yoghurt for a thicker consistency. I add a teaspoon of chia seeds – you can add more if you wish, but chia can be calorie rich so keep an eye on what you are adding.
I then add something to spice it up a bit like cinnamon or mixed spice. Give it a good stir because cinnamon doesn’t really dissolve in the milk. You can also add any supplements like whey protein, spirulina etc., seeds, or dried fruits like dates, apricots, sultanas, mixed peel.
My next addition to the pot is two types of chopped, sliced, or grated fruit. My favourites are grated apple (wonderful with cinnamon), pear, fresh raspberries, strawberries, blueberries, white peach and banana but you can use any fruits you like. The berries tend to be lower in calories than other fruits.
If you prefer sweetener, add a little sugar or some maple syrup, agave syrup or honey, but it really shouldn’t need any. Give everything a good stir, make sure the chia hasn’t clumped, and make sure that the oats are coated in the milk.
You can make a huge portion in a bowl and store it in the fridge, but I prefer to make individual portions in mason jars. Leave them in the fridge overnight and then they are ready to serve in the morning. I eat mine cold, but you can warm it up in a microwave or saucepan if you prefer. Couldn’t be easier.

oo 2

Dukkah

duk

Dukkah or Duqqa is a Middle-eastern dish which is a mixture of nuts, spices and herbs. It is quite versatile – I made mine to serve as a starter with bread. To use it this way, you serve some fresh crusty bread of your choice, a dish of olive oil with some balsamic vinegar added, then you tear off a piece of bread, dip it in the oil/balsamic and then dip it in the dukkah so that the dukkah mixture sticks to the bread. You can also dip fresh veggies in the same way. Dukkah can also be used as a crust for fish or chicken that you are going to oven bake or pan fry. This recipe makes quite a large quantity, so adjust the quantities to suit your needs. this quantity will easily serve 8 people if you are implementing the bread/oil starter idea, and you still might have some left over to use as a crust for a midweek meal.
There are a lot of variations, the following is the version that I made, but you can use different varieties of nuts, herbs and spices to get different flavour combinations. You don’t have to fry and toast the ingredients, but it really makes the end result more flavoursome if you make the effort.

This is what I did:
1. I heated the oven to 180 deg C. I put 120g of hazelnuts on a baking sheet and toasted them for about 5 minutes, shaking them regularly. Don’t burn them. When you take them out they should smell nice, as if the flavours are being released. I then whizzed up the nuts in a food processor so that they were a nice biscuit crumb consistency, and placed them in a large bowl.
2. I dry fried 80g of sesame seeds in a heavy based pan for 2 minutes, shaking them around as they heated. I then added them to the hazelnuts.
3. I dry fried 2 tablespoons each of coriander and cumin seeds in the same pan for 1-2 minutes until the aroma was released. I then ground them up in my spice grinder and added them to the bowl.
4. I added a further tablespoon of smoky paprika, a dash of chilli and a tablespoon of mixed dried herbs, along with approx 2 teaspoons of ground black pepper and a teaspoon of salt.
5. I mixed it thoroughly, and then tasted the mixture, adjusting the salt and pepper to taste.
Variation ideas are detailed below – you can have fun making the mixture that suits your tastes:
Nuts you can use include pine nuts, brazils, macadamias, almonds, pistachios, cashews. You can also add chilli, star anise, fennel seeds, cloves, cardamom, cayenne, thyme, mint, oregano etc.

Pearfect Pantry, Herdsman

Pearfect Pantry is a gem of a cafe near Herdsman Lake. It’s a bit hard to find, just off of Herdsman Parade. There is parking around the back by the lake and in some of the side streets off Herdsman Parade. Once you find it, it is a cave of vegan delights with numerous options for breakfast and great cakes. It’s quite quaint and casual – a place where the food is made with love.

Pear 1

I chose coffee and a vegan lemon cake.

Pear 2

On another occasion we chose the vegan Big Mack. This was really nice and came with hash browns and a great vegan sweet chilli/sour cream sauce. The bun was great, nice patty and tasty vegan cheese.

Pear 4
Pear 3

We also chose the vegan nachos, made with jackfruit, lots of chilli, onions, avocado and pickles and tasty nacho chips. The pulled jackfruit was a little soft, but tasty and the vegan sour cream delicious.

Pear 5

Here are some pictures of the food on offer.

Pear 8
Pear 6
Pear 7

You have to get the cakes when they are freshly made. We tried some muffins and they were a little stale however the cup cakes were good.

Last Visit Date – March 2020

Click here to find out more

Pearth Organic Kitchen, West Leederville

Pearth Organic Kitchen Menu, Reviews, Photos, Location and Info - Zomato

Pearth is a vegetarian/vegan cafe on Cambridge Street with a clean airy interior. We stopped by today for some takeout and were pleasantly surprised to see so many good options in the cabinet.

pok 1

Salads, wraps, savoury tarts, curries and bowls, it was difficult to choose, but in the end I went for a savoury pancake Okonomiyaki with king oyster mushrooms and cabbage. It was really good but could have done with a little more seasoning.

pok 4

My partner chose the vegan burrito which was huge, containing rice, beans, avocado, spinach and chipotle spice. It wasn’t too heavy on the spice and again could have been seasoned a bit more.


pok 3

We also checked out the cake cabinets

pok 2

We chose a date, walnut and garam masala muffin, which was tasty but quite dense – not the thing to choose if you want a light cake, but it was really good.

pok 5

We also chose a vegan snickers slice which was sweet and gooey and just like Snickers.

pok 6

The food at Pearth is definitely made with love and looks amazing. It is a little on the expensive side, but also good quality, they just need to pay a bit more attention to seasoning and it will be Pearthfect.

Visit Date – May 2020

Click here to find out more

Tag Cloud